Grilled Salmon with Red Wine Balsamic Sauce

This is going to be a quick one. I mean the post and the recipe. The post because I’m my usual pre-vacation frantic mess. And the recipe because it is easy and delicious and takes no time at all. I wish I could say that about preparing for a trip. I hesitate to reveal just how completely freaky I am about traveling, but there is no disguising the panic that sets in during the weeks leading up to a trip. It’s not that I’m afraid of flying so much, (over a vast ocean to another continent), as I am of dying and leaving all the loose ends of my life so completely untied-up. Like all the stuff I still want and need to do, and all the many minutes of joy I want to have with my kids, and my dogs and my cats, and the mornings I want to wake up in my perfectly comfortable bed and cook in my sun-flooded kitchen. So… convinced that I am not simply going on a fantastic and lucky trip to Spain, France and Italy to experience many culinary delights and sights, but actually hurtling toward my doom, I feel as though I need to take care of every possible thing before I go—from updating my will, and writing deep, weepy letters to my children, to scrubbing the toilets and dusting the heretofore neglected blinds, lest my relatives go through my house after my demise and think me a slob.

I’m exhausted from it all. And hungry. So this beautiful sauce, so quick and simple, with it’s incredible balance of acid, fruit and fat is the perfect balm for my tortured soul. And the cooking–bless the cooking–it takes me out of my really scary brain and into my body where all that counts is what is happening in the present, what my hands can do, what my senses can actually experience, what my appetite demands.

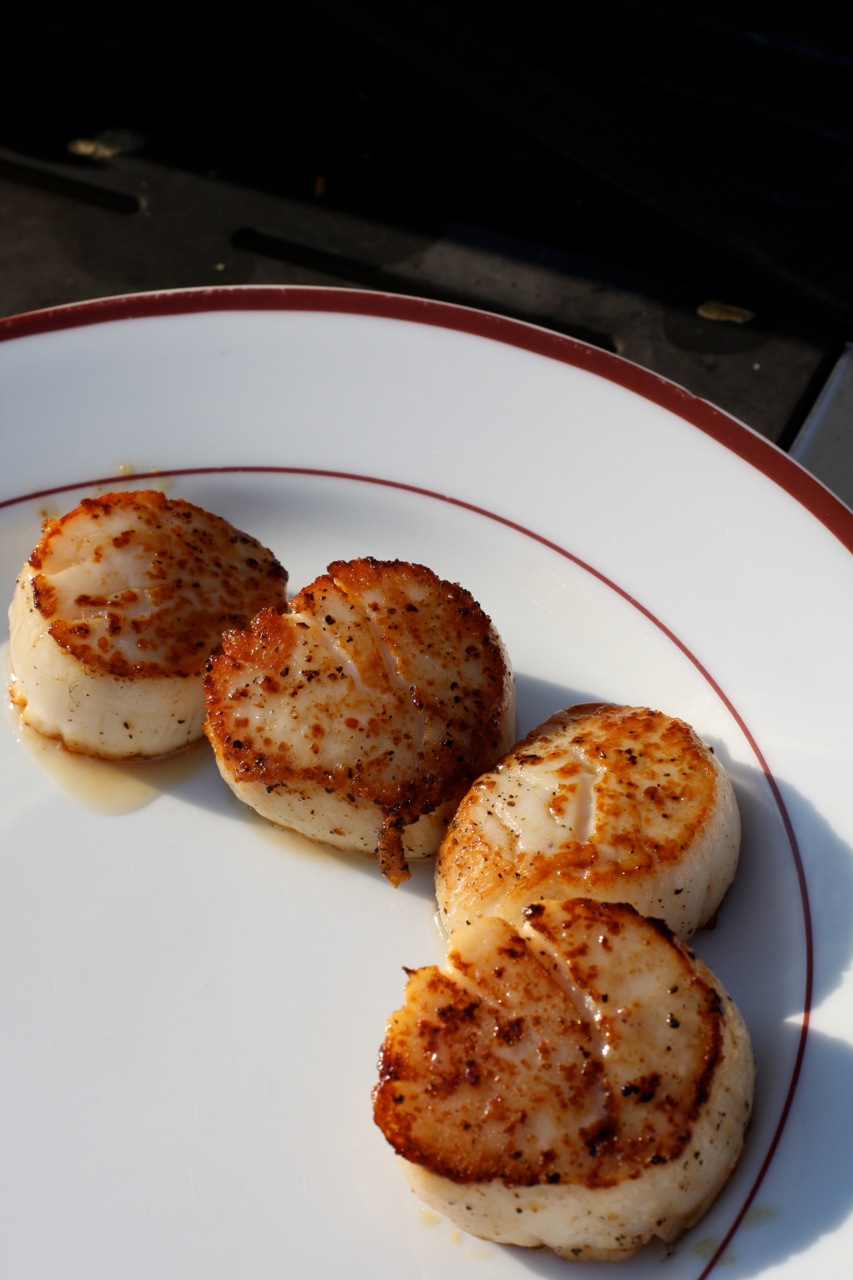
I drooled over this recipe when I saw it in the May, 2011 Food and Wine Magazine. It appeared as a side-bar feature to an article about a wine producer named Tarlov who grows pinot noir grapes, and his terroir, and other such details about wine and vineyards and soil that tend to lose me like a good algebra equation. As much as I want to learn it, master it, understand it…I can’t seem to retain it. But cook with it? Drink it? No problem!  The feature had recipes from top chefs who put Pinot Noir to good use and this one, from Alfred Portale of Gotham Bar and Grill in NYC captured my attention and got me cooking. Portale pan sears his salmon, but always looking for an excuse to grill in this weather, I figured out how I could take the fish outside (and the accompanying odor) and still get that crispy, crispy skin that comes with a good pan sear. Oh, and I decided to add some gorgeous scallops to the mix because they were calling to me from atop the mountain of crushed ice in my local fish monger’s display case, and because I love, love, love them.

I took my ancient Le Creuset cast iron griddle pan out to my grill and left it there on the blazing heat for about 10 minutes. When I could practically hear the pan scream, it was so hot, I drizzled it with a little high-heat oil and put the salmon on to sear, skin side up. Just two minutes on that side produces a wonderful color, then I flipped it to let the skin get really, really rendered and crispy, and for the salmon to get to medium, about another 6 minutes. When the salmon was almost done, I put the scallops on for their requisite 2 minutes on one side, one minute on the other for a translucent sweetness on the middle and a die-and-go-to-heaven crunch on the surface.


Make the sauce ahead, it takes a good 12-15 minutes to properly reduce. Then, just keep it warming in a double boiler or in a metal or glass bowl perched over a saucepan of simmering water. I served this with another quick no-brainer—spinach wilted in garlic-infused olive oil—and with my first red-wine sauce-slathered bite, I felt my shoulders relax and my senses kick in. Maybe vacation won’t be so bad after all.


ingredients

Salmon with Red Wine-Balsamic Sauce
adapted from Chef Alfred Portale, Gotham Bar and Grill, Food and Wine, May 2011

INGREDIENTS

Four 6-ounce salmon fillets (note: Portale calls for skinless salmon and pan searing. I kept the skin and crisped it up as shown)
1 tablespoon high-heat oil (grapeseed, canola)
1 small shallot minced
2 tablespoons extra virgin olive oil
1-2 sprigs of thyme
1/2 teaspoon cracked black pepper
2 cups dry red wine
1/4 cup balsamic vinegar
2 tablespoons heavy cream
4 tablespoons old unsalted butter, cut into cubes
Salt and freshly ground pepper to taste

directions
  • For the sauce:

    1. In a medium saucepan, heat 1 tablespoon of the olive oil. Add the shallot and cook over moderate heat until softenend, about 4 minutes. Do not brown. Add the thyme sprig, cracked black pepper, red wine and balsamic vinegar and boil this mixture over high heat until reduced to about 2-3 tablespoons, about 12 minutes. Remove the pan from the heat and whisk in the cream, then whisk in the butter a couple of cubes at a time. Strain sauce through a fine strainer into a metal or glass bowl. Season with salt and pepper to taste. Keep warm.

  • For the salmon:

    (Note: here is Portales pan searing directions, but these can be applied to my pan-on-the-grill method shown above.)

    1. Season all sides of the salmon with salt and pepper. In a large nonstick skillet, heat the remaining tablespoon of olive oil (I used canola for the high heat of the pan on the grill…I was going for that hot, hot sear…). Add the salmon to the hot pan, skinned (or skin) side up. Cook over moderately high heat until the surface on the pan is well-browned, 2-4 minutes. Turn the salmon carefully and cook over moderate heat until the fish just opaque throughout, about 3-5 minutes longer depending on thickness. Transfer salmon to plates, spoon the sauce over the fish and garnish with more fresh ground pepper.


zucchini ricotta tart with almond cheese crust


At first it’s so cute. The zucchini flowers bud and you can practically taste the stuffed blossoms you are going to make, even though they take so much time to stuff and batter and fry—it’s worth it for that taste-of-summer burst you get in your mouth, even if they burn your tongue because you couldn’t wait to let them cool properly. Then, the mini zucchinni appear like wee cherubic willies (yes, willies). You pad out in your pajamas every morning to check their progress and it feels as though winter was a bad dream that will never again recur.

But shortly, you will be thinking, “what the hell am I going to do with all these zucchinni?”  In certain neighborhoods you already have to be careful to lock your car when you run into the post office or return to find your back seat filled with zucchini by an overwhelmed gardener desperate to find her crop a home plate. So, if you are up to your ears in breads, muffins and casseroles greenly laced with the stuff and have already had enough of it grilled-marked to make you see lines everywhere, even with your eyes closed, then this lovely tart may be just the remedy for your zuke overload. Even if the closest you are coming to the work of harvesting zucchini is breaking a sweat trying to find the end that opens on the plastic bags in the produce section of your supermarket, you can enjoy this seasonal abundance all the same. Many stores and farmers markets are surely carrying locally-grown zukes and it’s your chance to live and eat locally and seasonally, for now and the next few glorious months.

If you haven’t yet made my almond cheese crackers, here is a chance to try this addictive dough as an entire crust, (so fast and easy…you can’t ruin it, overwork it, no refrigerating to wait for the gluten to relax),

pressing it out with your fingertips into every little scallop of the pan until it’s evenly filled.

Then, blind baking it (no wieghts needed) for about 15 minutes or until lightly golden.

All that’s left to do to is fill with the cheeses and arrange the seasoned zucchini coins in a circle pattern until it completed covered.

I know this tart would be amazing with a standard tart dough, or as a rustic gallette (no tart pan, just arrange everything on the dough, leaving a border of dough to fold over making a free-form crust), and for those of you who want your flour, and want it now, I am also posting at the bottom of my recipe, a delicious flour-based dough recipe that Deb, from Smitten Kitchen, uses for her savory tarts, adapted from William Sonoma.


zucchini tart with almond cheese cracker crust
filling adapted from Cook’s Illustrated, crust adapted from Primal Blueprint Cookbook

For the crust:

Make a batch of my almond cheese crackers.

For the cheese and zucchini filling:

1 large or 2 medium zucchinis, thinly sliced (1/8 inch setting on my mandolin, or as close as you can get to that by hand)
1-2 tablespoons extra virgin olive oil
1 garlic clove, finely minced
1/2 cup ricotta cheese
1/2 cup grated parmesan or romano cheese (or mix both)
1/4 cup shredded or grated mozzerella
1 tablespoon basil chiffonade (chopped into thin slivers, but fancier when you say it in French)

PROCEDURE

1. Slice the zucchini with a mandoline, 1/8 inch setting, or slice by hand as close to that and as consistently as you can. Spread the slices out onto one or two sheet pans lined with paper towels. Sprinkle the slices generously with kosher salt, on both sides and allow them to sit and release their considerable water content onto the towels, for about 30 minutes. Pat dry.

2. While the zucchini are sweating out their moisture, make the crust by preparing my almond cheese crackers recipe. Preheat the oven to 375 degrees F. Press the dough into a lightly greased, fluted 9-inch tart pan (or similar flat pan) until you form a 1/4 inch thick crust along the bottom and sides. Bake the crust (weights are not needed) for about 15 minutes, or until lightly browned but not too brown because you will bake it again with the filling and you don’t want the crust to get over done. Remove from oven and allow to cool before filling.

3. While crust is baking and cooling, mix the olive oil and minced garlic in a small bowl. Hold aside. In another bowl combine the cheeses, salt and pepper to taste and a teaspoon of the garlic and oil mixture.

4. Pat the sweating zucchini dry. Once the crust is cooled, begin filling it by spreading the cheese mixture evenly over the bottom of the crust. Then, begin laying down the zucchinni slices, shingle style (overlapping evenly) in a circle along the outer rim of the pan. Create another circle inside that circle and another one until the cheese mixture is completely covered by zucchini.

5. Evenly drizzle or brush the top of the zucchinni with the remaining garlic/oil mixture. Bake the tart until the cheese looks puffy under the zucchini and the zucchini is wilty and lightly carmelized. The rim of the crust should be a nice golden brown. Remove from the oven, sprinkle with slivered basil. and let cool for at least 5 minutes before serving. Cut into wedges. Serve warm or at room temperature.

For the flour-based pastry dough:

1 1/4 cups all-purpose flour, chilled in the freezer for 30 minutes
1/4 teaspoon salt
8 tablespoons (1 stick) cold unsalted butter, cut into pieces and chill again
1/4 cup sour cream
2 teaspoons fresh lemon juice
1/4 cup ice water

Make dough: Whisk together the flour and salt in a large bowl. Sprinkle bits of butter over dough and using a pastry blender, cut it in until the mixture resembles coarse meal, with the biggest pieces of butter the size of tiny peas. In a small bowl, whisk together the sour cream, lemon juice and water and add this to the butter-flour mixture. With your fingertips or a wooden spoon, mix in the liquid until large lumps form. Pat the lumps into a ball; do not overwork the dough. Cover with plastic wrap and refrigerate for 1 hour. Then, roll out the dough to a roundish form, about 1/8 to 1/4 inch thick. I gently fold the dough in half and carry it over to the pan as if it were a wounded bird, not wanting to disturb it or damage it or tear it, then unfold it in the pan. Or, you can transfer the dough to a parchement lined baking sheet and make a more free-form gallette.

kefta meatball kabobs

Why put a meatball on a skewer?, you may be thinking.  Well, haven’t you ever heard that childhood song about the meatball, the one on top of spaghetti, all covered with cheese? To quote that sorrowful tome “I lost my poor meatball, when somebody sneezed. It rolled off the table and onto the floor and then my poor meatball rolled out of the door. It rolled through the garden, and under a bush, and then my poor meatball was nothing but mush.” Mush! Right there is a reason to secure one’s meatballs on a skewer, if you ever needed one.

If that story doesn’t move you to skewers, then I don’t know what will. Perhaps the idea of lining them up, 4-5 at a time, creating a kabob of sorts, that can be carried nicely to a grill or grill pan and charred to a smoky deliciousness, will do it for you. Either way, you must try these because they are really just that good. Not good in a familiar, your-mom’s-meatballs-kind-of-way, but in an unexpected, eating-at-your-new-friend’s house-and-liking-it version.  I know that cinnamon, allspice and nuts sound like the makings of a good old American apple pie, but when you take these ingredients and add them to meats you are suddenly lost somewhere in view of the Mediterranean Sea. Morrocco. Algeria. Greece. Turkey.

So to skewer or not to skewer? Who cares! Just make these meatballs, which I have tweaked to be gluten and grain free, (no white bread soaked or breadcrumbs here) and you will not look back. And even if you can’t grill them, they are just as delicious pan fried, or even better, (less mess, less time,) baked in the oven, sans skewers, if you will. In fact, I solved the slippery puzzle of moving skewered raw meatballs from the sheet pan to the grill, by just tossing the whole pan of them into the oven for about 7 minutes, until they firmed up around the skewer, then finished cooking them all the way through on the grill. (You can use an indoor grill pan, or cook them fully in the oven and finish by broiling to brown the tops a bit.) And don’t forget to make a mini patty of the final mix and fry it up on the stove top (see how cute!) to taste and have an opportunity to balance out the flavors, salt, consistency, etc. Some of you may be adventurous raw-meat-and-egg-tasting purists, but since these will be eaten cooked, they should be tasted and tweaked from a cooked sample.

Kefta are traditionally made with ground lamb, but you can use a combination of beef and lamb, or turkey and lamb, if you want to tame the lambiness. When I made them this past weekend, I had two pounds of veal-pork-beef mixture, from the Amish market in nearby Flemington, NJ, where I feel like a kid in a candy store—not because of the homemade donuts the women and girls in the little lace caps turn out by the hundreds, but because every cut of meat there, from rotisserie chicken and turkey, to handmade pork breakfast sausages, is locally and humanely raised, and hormone and anti-biotic-free. Our local chain supermarkets have come a long way in terms of organic and drug-free meats, but mostly we are still confined to a small corner of the store with a few chickens, some ground meat and three trays of outrageously-priced and tiny steaks. So, I love the variety and abundance of the Amish market. I used this gorgeous trifecta of meats for my Kefta.

Then, knowing I was going to omit the usual soaked white bread or bread crumbs to go gluten-free, I added finely chopped mushrooms and egg, along with herbs from my weedy but abundant garden, (“thank you for your bounty” I say whenever I snip at them, in case they have feelings, which I suspect they do,) for moisture and binding. Enjoy soon!


Kefta Meatball Kabobs

Makes 20-24, 2 inch diameter meatballs.

For Kefta

8-10 white button mushrooms, finely chopped (food processor or by hand)
1 small onion, finely chopped (food processor or by hand)
1/4 cup fresh parsley, chopped
1/4 cup fresh basil, chopped
1 pound ground meat (lamb, lamb and turkey, lamb and beef, veal, pork, etc. if using only turkey add 1-2 T. olive oil to mix)
1 egg
1 teaspoon salt
1/2 teaspoon ground allspice
1/4 teaspoon cayenne (or more if you like more heat)
1/4 teaspoon cinnamon
1/4 teaspoon black pepper
1/3 cup walnuts, toasted lightly and finely chopped

You’ll need: 10-12 metal or wooden skewers (or not if you don’t skewer these. Do not NOT make these because you have no skewers!  Just don’t let them roll off the table and onto the floor…). If you use wooden skewers, soak them in water for 20 minutes before using them. This will keep them from buring on the grill.

For Yogurt Sauce 

1 cup plain yogurt (for creamier version of this use whole milk yogurt, or thicker greek yogurt)
2 tablespoons fresh mint, finely chopped
2 teaspoons honey
1 teaspoon fresh garlic, finely minced (I can’t do raw garlic, so I leave this out or substitute just a little garlic powder here if I want a garlic flavor)
salt and pepper to taste

PROCEDURE

1. Yogurt Sauce: You can make this hours in advance. One problem I encountered with this sauce is combining honey into cold yogurt…it doesn’t work so well….so you can bring the yogurt to room temp first (make your meatballs in the meanwhile), then warm the honey a bit in the microwave (12 seconds or so) and it will mix in more easily. Combining all the ingredients in a small bowl and holding in the fridge, covered or in airtight container.

2. Meatballs: prepare all ingredients as specified (chop, process, etc.), then combine them with the meat in a large bowl, mixing with your hands thoroughly. (take off all rings!)

3. Get your grill or grill pan ready and up to heat. You don’t want to put these on a cold grill…they will stick. Using a paper towel and some oil with a higher smoke point (canoloa, safflower, grapeseed) wipe down the grill or grill pan to lightly grease them (while the pan is cold, please!). Preheat your oven to 375 degrees.

4. Form the meat mixture into 2-inch diameter meatballs and line them up on a lightly greased sheet pan or SilPat lined sheet pan, in rows of 4 each. Thread a skewer gently and evenly through each row of 4. (as pictured above).

5. Place the entire sheet of meatballs, skewers and all, in the oven and bake for 5-7 minutes or until they have firmed up enough to move them from the pan to the grill without them slipping off the skewers. If you aren’t grilling them, then let them finish baking in the oven, an additional 12-15 minutes until browned, turning them once to brown evenly (optional). If you want more char on them, you can finish by switching your oven to broil, on high, for 3 minutes or so, staying close by and watching so they don’t burn. Remember, as things get browner, they cook faster….so don’t turn your back on them!

6. If grilling, then remove the meatballs from the oven after 5-7 minutes and transfer the skewers to the grill or grill pan to achieve a grill marked and charred kebob.

7. Serve with yogurt sauce. I’ll leave the side up to you, but my Tangy Garden Slaw would do nicely for those eating grain and gluten-free, or any fresh salad, with a crumbling of feta on top. For those who aren’t, think about a fluffy buttered rice, or rice pilaf or my Polenta Fries.

Let me know your thoughts…and how they came out by leaving your comments below!


roasted garlic herb cherry tomatoes

I don’t need a special reason to post these melty, amazing, swoon-producing, bursting-with-flavor, crowd-appeasing roasted tomatoes, instead of the zucchini tart I promised I’d post next, but the cherry tomato plants in my garden are insisting that NOW is the time. Pick me NOW they are saying. EAT ME NOW!  I’m sweet and juicy and unlike any middle-of-the-winter hydroponic ones you’ve known.  DON’T WAIT, YOU FOOL! They are bossy, but I put up with them because they are so pretty.

Also, this past weekend I did a cooking class party for Kim H. and her 13 guests at their gorgeous Chester, NJ home and promised everyone a copy of this deceptively simple recipe, that once sampled, demands to be replicated. The flavors, the versitiliy of the finished product (condiment, chutney, side dish, pasta-pizza-rice-sandwich topper) and the utter simplicity of the recipe, make this a revelation and a joy for everyone, regardless of their skill level. I have more requests, more feedback, more comments and emails for this recipe, than any other…so I too think it’s time to finally post. I usually provide everyone in my parties with copies of all the recipes we do, but this past week, I added the tomatoes as an after thought, arriving 30 minutes early to throw them in the oven so guests would have a bite to eat early on in the class. It’s hard enough to keep everyone’s attention for cooking at these weekend, couples’-night-out events, when the wine starts flowing early, but even harder if they are working on an empty stomach. So for Kim H. and her guests, and the rest of the world, in perpetuity, here are the goods.

Tomatoes.. Sweet grape or cherry variety. Yellow and red if you can find both. If not, just red. Smash some garlic. Preheat the oven, 400 degrees.

Place the tomatoes in a baking dish with the garlic. Drizzle with good olive oil and balsamic vinegar. Salt, pepper, throw in some rosemary leaves and thyme (fresh is better, but dry will do in a pinch). Mix it up well to coat. It’s ok that the oil and vinegar don’t stick together.

When it’s all done, (30 minutes or until they look all melty and carmelized), the juices from the tomatoes, the oil, the reduced and syrupy vinegar and the garlic-herb essence will all become as one. And your house will be infused with the most amazing, mouth watering aroma. Have some toasted baguette or ciabatta ready to slather these on. Or a nice piece of grilled or rotisserie chicken skewered on a fork to push these over and make a perfect bite. Or, pile these on a nice piece of fish, drizzle with a little more oil, salt and pepper and bake for 12 minutes. Or boil some pasta to a firm al dente, save 1/2 cup of pasta water, drain it, throw back into the pot with the pasta water and a few cups of these tomatoes and their juices, toss in some grated parmesan and then try to convince yourself you haven’t died and gone to heaven.


I make a batch of these using two or three containers of tomatoes (or my home-grown ones for now) every Sunday so I can always have them in my fridge to dress up or accompany anything, at any time. They are a staple in my house. They stay good for up two weeks in an airtight container in the fridge and still taste fresh, (but don’t count on them being around for that long)…just heat them up a bit or let them come to room temp to eat. If you are growing tomatoes, but not the small variety, you can make this with larger tomatoes as well….just cut the tomatoes up into 2-inch chunks and treat them the same. That’s your FoodFix for now!

roasted garlic herb cherry tomatoes

1 container red grape or cherry tomatoes
1 container yellow grape or cherry tomatoes*
3-4 tablespoons extra virgin olive oil ( a healthy drizzle to coat
1-2 tablespoons balsamic vinegar
2 teaspoons chopped rosemary leaves and thyme leaves (or a few thyme sprigs)
salt and pepper to taste
4 cloves garlic smashed
1/4 teaspoon granulated sugar (optional, but will help add sweetness to winter tomatoes and help along the carmelization)

PROCEDURE

Preheat oven to 400°F.

Toss tomatoes with oil, vinegar, herbs, salt and pepper and garlic (and sugar, if using) and spread the mixture on a sheet or in a roasting pan, or glass baking dish. Roast for 25-30 minute, or until tomatoes have split open, browned a bit on the top and look “melted.” It’s worth waiting until they are really broken down and melty, so don’t rush. You can gently turn tomatoes once or twice during roasting to re-coat with oil and released juices, but they will turn out beautifully even if you don’t!

*You can sometimes find containers of mixed red and yellow tomatoes. If you can’t find any yellow tomatoes, get all red. Organic grape tomatoes are preferable if you can find them.

Almond Cheese Crackers

Alas, the heaven that is gluten, the source of lofty loafs, crusty crusts, perfect pizzas, doughy delights, this panacea of palette pleasing pleasure (and inspiration for unending alliteration, too, apparently), is my private digestive hell. I confess here and now that I am gluten intolerant. Yes. So sad.

For me eating gluten creates a combination of symptoms that have no business being described in a food blog, so I won’t, but it is not pretty, I can tell you that. The “opportunity” now, (this is the word we use when we screw up our optimism and decide that lemonade must indeed be made from all the lemons that are raining down on us) yes, the opportunity, is to research, test, adapt and create  amazing food that is gluten-free, and share it with you here. I’ll still be offering recipes that contain grains. As a chef and culinary instructor who has to constantly develop new and fun menus for my clients to explore, I can’t stop playing with all kinds of food, so this is NOT going to be a gluten and grain free site. But, in truth, I’ve been exploring a lot of grain-free cooking lately because my husband, Dr. Doug, has been teaching and personally following a diet and lifestyle plan he calls Quantum Paleo. He teaches it as an online seminar and corporate team and health building workshop (groups in an office setting competing against each other to lose weight) and the diet is largely grain-free. He lost 28 pounds doing it, so who am I to complain if this is how he expresses his mid-life crises! I took this of him at a family bbq with an app on my iphone called Hipstamatic, that takes pics in a cool retro 80’s style in black and white or color.

I’ll be launching a page on this site about Paleo cooking and eating…called Paleo-licious, to give a more detailed description of this philosophy for anyone interested, but in the meanwhile, let’s get back to these addictive crackers, shall we?

You see, they are delicious. And crunchy. And satisfying. And you can pile stuff on them, just like a regular cracker, but no grains, no gluten. Just tons of flavor and only five ingredients. Almond meal, olive oil, grated parm/pecorino, water and herbs. All protein and good-for-you fats. I love these so much I’ve turned this “dough” into a pie crust for a variation on a savory Zucchini Tart which is a whole other story. (Next post, I promise!)

Almond meal may be a challenge to find in a regular grocery store, but you can always make it at home by finely grinding blanched almonds in a food processor. I’ve found it at Whole Foods, Fairway (NYC). Find it online at Bob’s Red Mill.


herb and almond cheese crackers

adapted from Primal BluePrint Cookbook, Mark Sisson

Makes approximately 15-18 crackers

Ingredients

2 cups fine almond meal
2 tablespoons chopped fresh rosemary leaves (or thyme, oregano, parsley, herbs de provence or any combination you like. Using dried herbs in a pinch will do, but fresh, of course, will pack more flavor.)
1 cup finely grated Parmesan or Romano cheese (please, no grocery store kind in the big green cylander. Good grated versions are usually available in your supermarket’s deli or specialty cheese section.)
2-3 tablespoons extra virgin olive oil
3 tablespoons cold water

Procedure

1. Preheat oven to 350 degrees F. In large mixing bowl, add all the ingredients and combine to form a moist, sticky mass of “dough.” If it seems too dry to come together, you can add more water or oil as needed.

2. Transfer the dough to a SilPat or parchement lined, or lightly grease baking sheet. With damp fingers, flatten the dough out into a thin rectangle measuring about 10×8 inches or so. It does not have to be perfect…but around that size will five you thin, crispy crackers.

3. Sprinkle the dough with sea salt or kosher salt on top if desired (poppy seeds, sesame seeds, flax seeds, caraway, can all work nicely here too for more crunch and added flavor.). I like to score the dough into strips or squares (scoring means cutting a shallow line across the dough, but not cutting all the way through the dough.) It makes it easier to break up into neat little crackers or any size. Or I have also used a pastry cutter, (round, scalloped or square) to cut shapes out of the dough before baking.

4. Place the sheet of scored or cut dough in the heated oven and bake for 15 minutes or until the dough looks dry and golden in appearance. The edges will brown darker than the middle, so pull them out when the edges are deep golden and the middle is lighter, but still has color. If you didn’t score or cut the dough before baking, wait until the dough has cooled to do so. Use a pizza cutter or sharp knife to cut up into cracker-sized pieces. Store in an airtight container, if making ahead. Will last up to a week or longer, if refrigerated, but trust me, you won’t have these hanging around that long.

Note to Paleo dieters: some of you consume dairy, some don’t, so these may or may not fit into your everyday diet. But as a treat, eaten in moderation, they are fantastic, high protein and grain-free.